Create a Windows user for WebSphere
- Log in to Windows by using an administrator user account.
- Select Start > Control Panel > Administrative Tools > Computer Management > Local Users and Groups.
- Right-click Users and select New User.
- Type a user name and password in the appropriate boxes, and type any other information you require in the remaining boxes.
- Deselect User Must Change Password At Next Login, click Create, and then click Close.
- Click Users, right-click the user you just created and select Properties.
- Click the Member Of tab and then click Add.
- In the Enter The Object Names To Select box, type
Administrators, click Check Names to ensure that the group name is correct. - Click OK and then click OK again.
- Select Start > Control Panel > Administrative Tools > Local Security Policy > Local Policies.
- Click User Rights Assignment, and then right-click Act as Part of the Operating System and select Properties.
- Click Add User or Group.
- In the Enter The Object Names To Select box, type the name of the user you created in step 4, click Check Names to ensure that the name is correct, and then click OK.
- Click OK to close the Act As Part Of The Operating System Properties dialog box.
Create a Linux or UNIX user for WebSphere
- Log in as the root user.
- Create a user by entering the following command in a command prompt:
- (Linux and Sun Solaris)
useradd - (IBM AIX)
mkuser
- (Linux and Sun Solaris)
- Set the password of the new user by entering
passwdin the command prompt. - (Linux and Solaris) Create a shadow password file by entering
pwconv(with no parameters) in the command prompt.NOTE(Linux and Solaris) For WebSphere Application Server Local OS security registry to work, a shadow password file must exist. The shadow password file is usually named /etc/shadow* and is based on the /etc/passwd file. If the shadow password file does not exist, an error occurs after enabling global security and configuring the user registry as Local OS.* - Open the group file from the /etc directory in a text editor.
- Add the user who you created in step 2 to the
rootgroup. - Save and close the file.
- (UNIX with SSL enabled) Start and stop WebSphere as the root user.
Enabling Global security
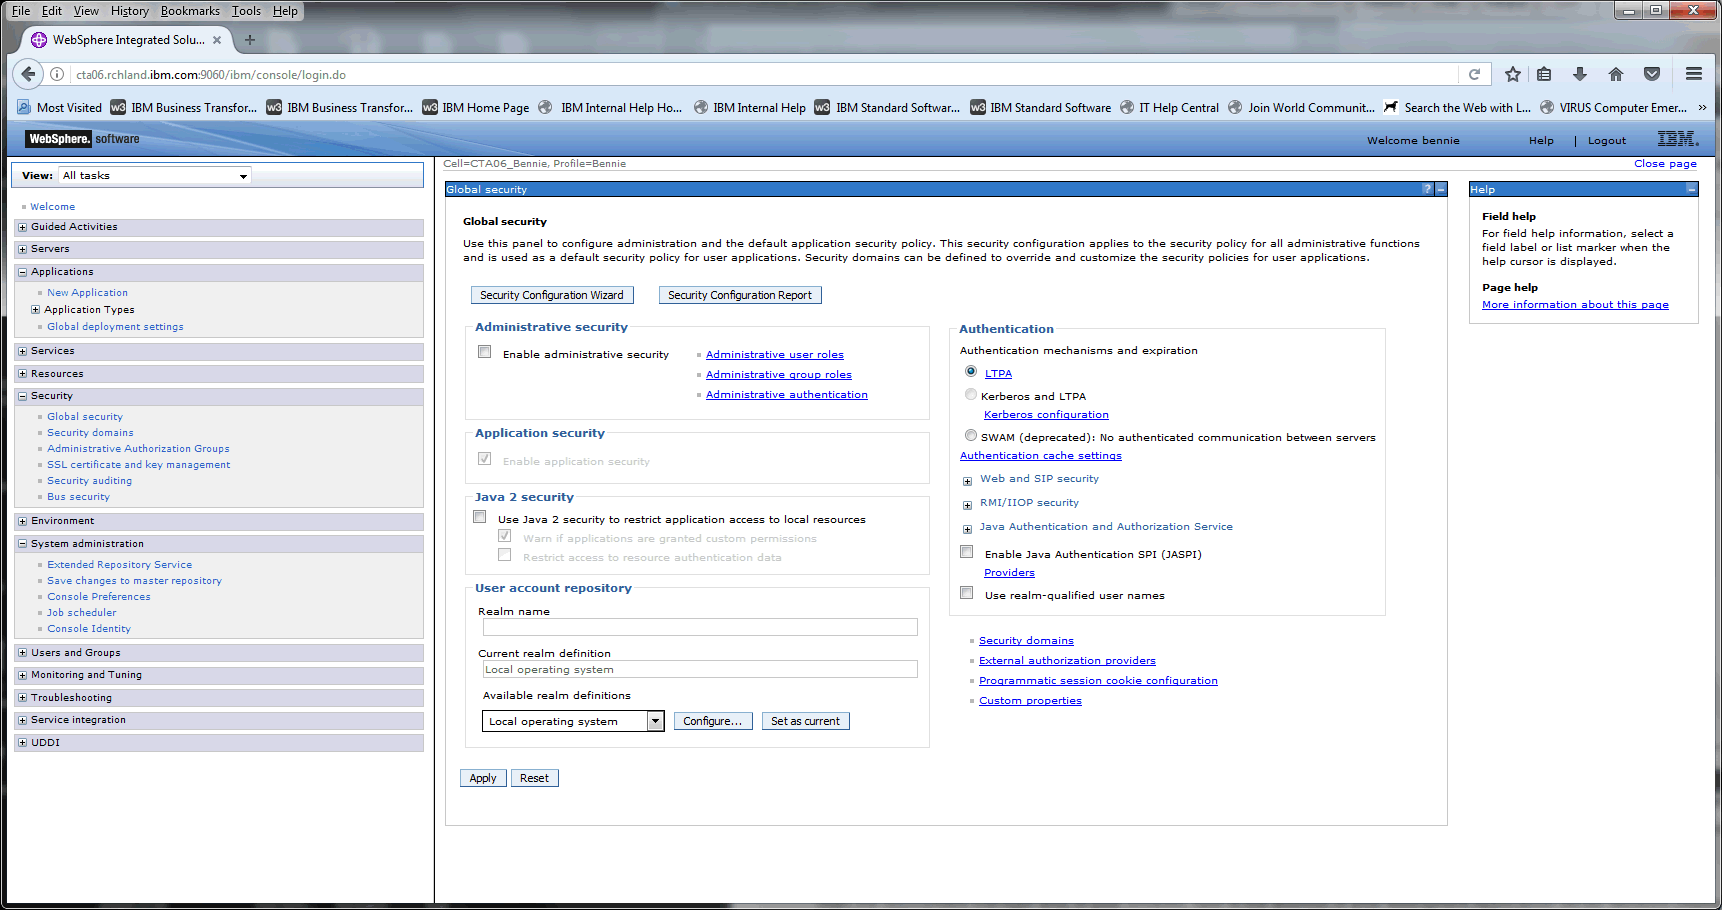
1) Log onto your WebSphere Application Administrative console.
2) Select Security – Global Security

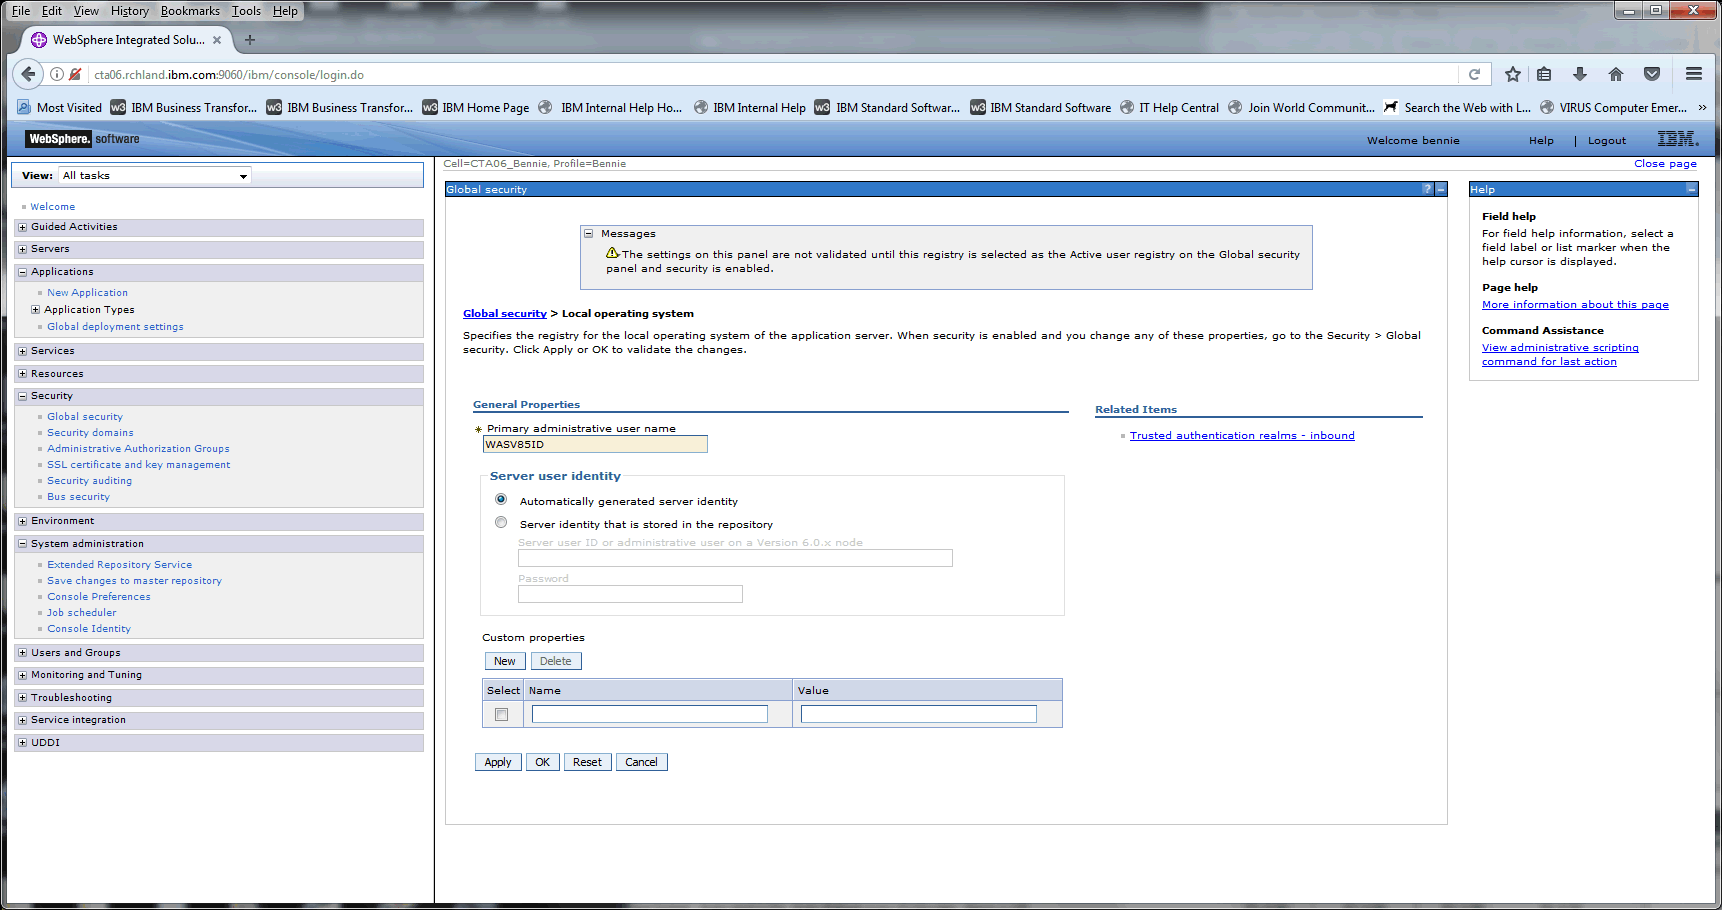
3) Ensure Local operating system is selected under Available realm definitions – select configure
4) Enter your Primary Administrative user name.

5) Apply and Save your changes
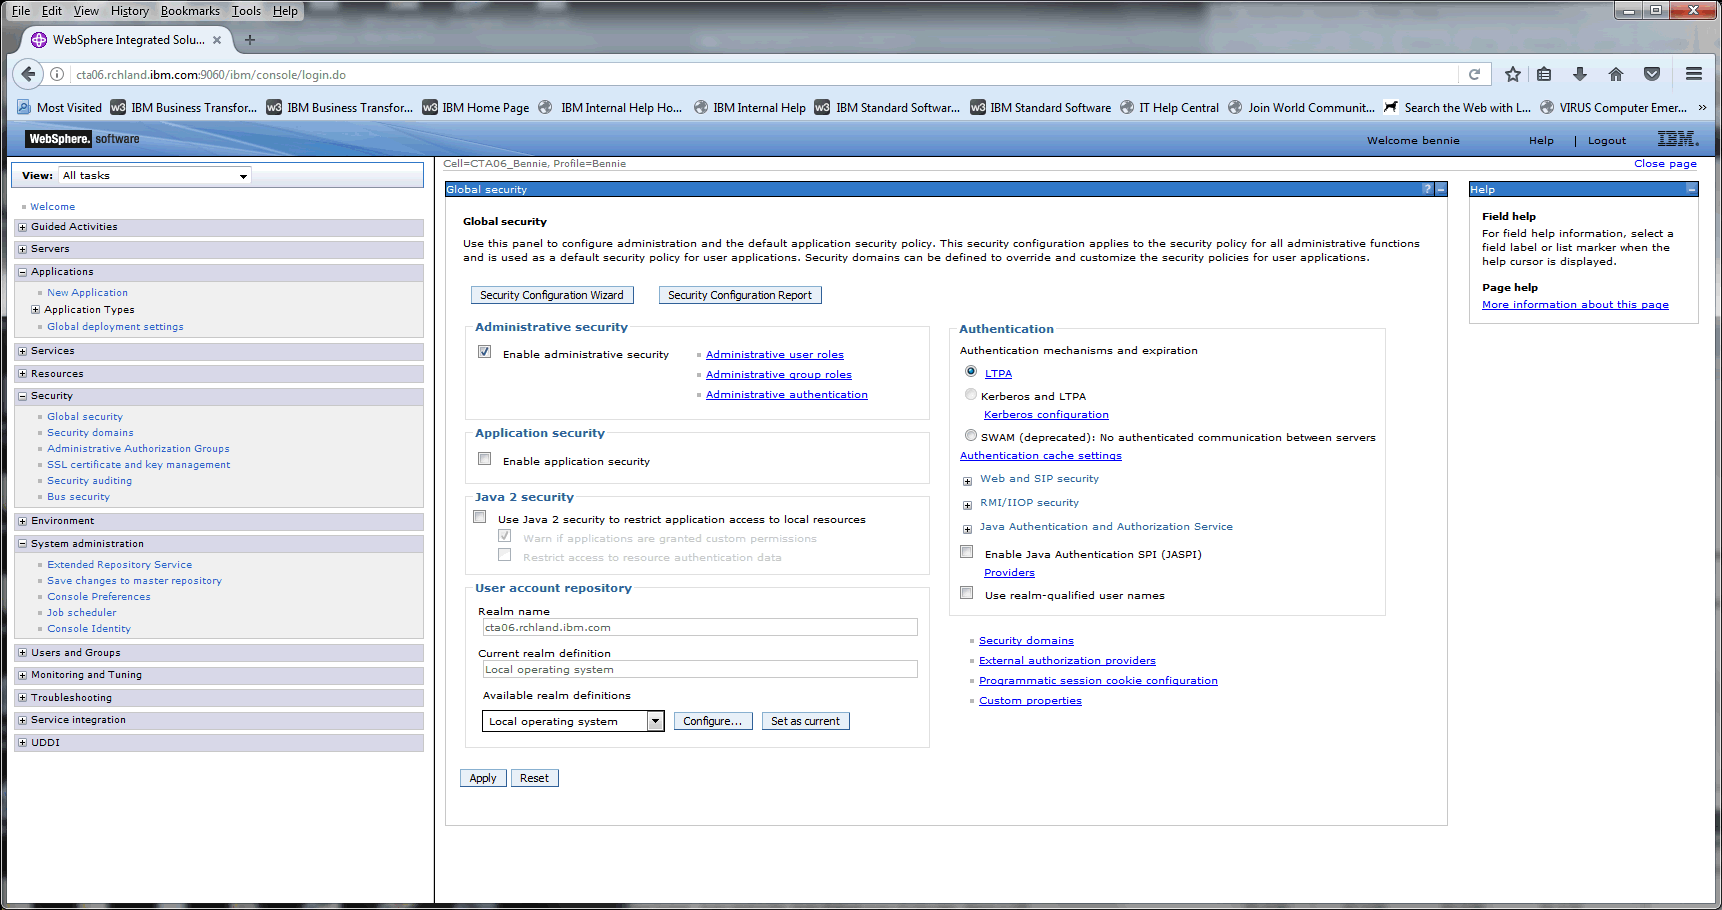
6) Select Security – Global Security
7) Enable Administrative security. Uncheck Enable application security. The purpose of this document is to enable Administrative Security only.

8) Apply and Save your changes. Restart your WebSphere Application Server.
9) Once the server is restarted access your WebSphere Application Server Administrative console. This is a SSL connection, if you see SSL errors accept the exception to continue. You will be prompted for a user ID and Password
Once above steps are completed we should be able to login to websphere admin console with OS local id and password .
Configure WebSphere to use the other id’s as Deployer,monitor,operator or any other roles as per requirement
- Ensure that WebSphere is running.
- In WebSphere Administrative Console, select Security > Global Security.
- Under Administrative security, select Administrative user roles.
- Click Add and do the following:
- Type * in the search box and click search.
- select the roles under roles.
- Add the newly created user to Mapped to role .
- Click OK and save your changes.
